Embrace the Spooky Season with Adorable Mini Pumpkin Breads: A Melty Chocolate Delight for Halloween
As autumn leaves begin to crisp and a chill permeates the air, our thoughts inevitably turn to cozy comforts, warm spices, and the joyous anticipation of Halloween. This year, elevate your festive celebrations with a treat that's as enchanting to look at as it is delightful to eat: adorable mini pumpkin breads, each hiding a secret core of melty dark chocolate. This isn't just any fall bake; it's the ultimate pumpkin bread Halloween edition, designed to bring smiles, warmth, and a touch of magic to your kitchen.
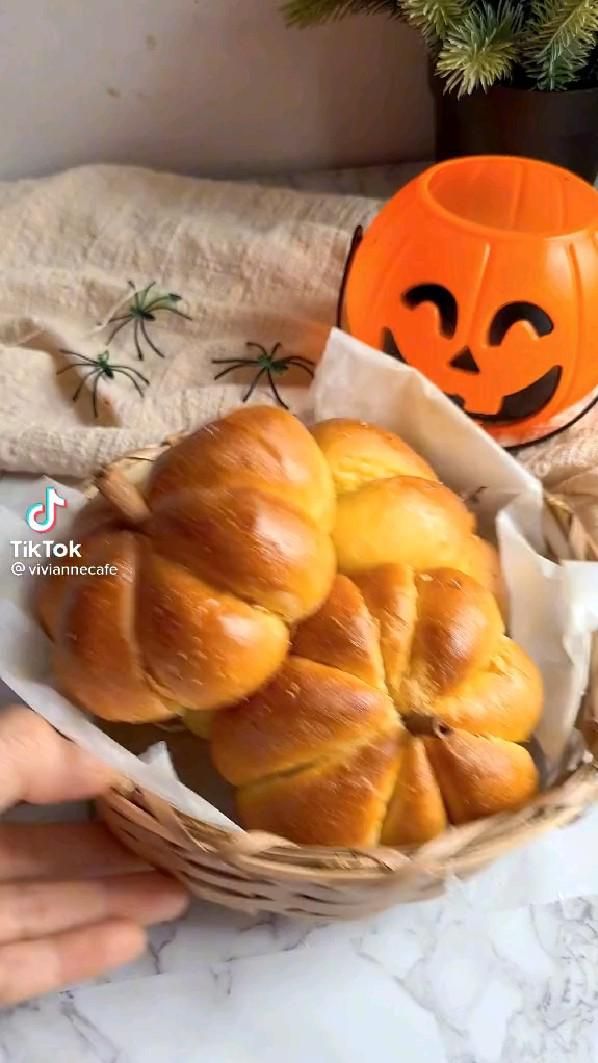
Imagine soft, golden loaves, perfectly shaped like miniature pumpkins, emanating the inviting aroma of sweet pumpkin and warm butter. With every bite, you'll discover a gooey surprise – a square of rich dark chocolate, perfectly melted and ready to complement the tender, spiced crumb. These charming little breads are more than just a dessert; they're an experience, promising to be the star of your Halloween party, a delightful addition to brunch, or simply a cozy treat for a quiet autumn evening.
Why These Mini Pumpkin Breads Are Your Halloween Must-Have
What makes these particular pumpkin breads stand out in a sea of fall-themed recipes? It's a combination of irresistible charm and unparalleled flavor that truly captures the spirit of the season. They are:
- Unbelievably Adorable: Shaped like tiny pumpkins and ready for playful decorations like candy eyes, these mini breads are almost too cute to eat. They instantly add a festive touch to any table, making them perfect for Halloween gatherings, school bake sales, or delightful gifts for neighbors.
- Packed with Authentic Fall Flavor: Made with real pumpkin purée, they deliver that unmistakable, comforting taste of autumn in every mouthful. The natural sweetness and earthy notes of pumpkin are beautifully balanced with subtle hints of spice, creating a truly memorable flavor profile.
- A Melty Chocolate Surprise: The hidden dark chocolate square is the pièce de résistance. As the bread bakes, the chocolate melts into a rich, gooey center, providing a luxurious contrast to the soft pumpkin dough. It's a delightful secret that makes each bite an exciting discovery, transforming a simple bread into a magical treat. For more homemade goodness featuring these key ingredients, explore our Homemade Mini Pumpkin Breads: Real Pumpkin & Rich Dark Chocolate article.
- Incredibly Tender and Soft: Thanks to the inclusion of real pumpkin purée and melted butter, these breads boast an exceptionally soft and moist crumb. Unlike some drier pumpkin loaf recipes, these minis remain tender for days, though they're rarely around that long!
These aren't just a seasonal bake; they're an invitation to create lasting memories, filling your home with the enchanting scents of autumn and the joy of a homemade treat. If you're looking for more general Halloween baking inspiration, check out our Easy Halloween Pumpkin Bread: Delicious Fall Flavors & Spooky Fun for other delicious ideas!
The Magic Behind the Melty Chocolate & Tender Crumb
The secret to these exquisite mini pumpkin breads lies in a harmonious blend of simple yet powerful ingredients. Each plays a crucial role in achieving that perfect golden color, soft texture, and irresistible flavor:
Key Ingredients and Their Contributions:
- Pumpkin Purée: This isn't just for flavor and color; real pumpkin purée is the cornerstone of tenderness and moisture in these breads. It contributes natural sweetness, a gorgeous autumnal hue, and keeps the crumb wonderfully soft. Using a good quality canned purée or even homemade for an extra fresh taste will make all the difference.
- Melted Butter: Beyond just adding richness and a delightful aroma, melted butter helps to create an incredibly tender dough. It coats the flour proteins, preventing excessive gluten development, which results in a softer, more delicate texture.
- Dark Chocolate: The hidden treasure! Opt for good quality dark chocolate squares (around 60-70% cacao) for the best melty experience. The slight bitterness of dark chocolate provides a beautiful counterpoint to the sweet pumpkin, creating a sophisticated flavor profile that appeals to both kids and adults.
- Milk & Yeast: Unlike many "quick breads" that rely on baking soda or powder, this pumpkin bread Halloween edition uses active dry yeast. The lukewarm milk activates the yeast, allowing it to work its magic by fermenting the sugars in the dough, producing carbon dioxide. This process gives the bread its incredible rise, airy texture, and distinctive soft chew that's characteristic of a truly well-made yeast bread.
- Sugar & Spices: Granulated sugar provides sweetness, while a blend of traditional fall spices like cinnamon, nutmeg, ginger, and cloves amplifies the pumpkin flavor and evokes the cozy feelings of autumn.
The combination of these elements, especially the yeast-leavened dough, sets this recipe apart, delivering a texture and depth of flavor that's truly special.
Bringing Your Adorable Mini Pumpkins to Life: A Step-by-Step Guide
Creating these charming mini pumpkin breads is a joyful process, and with a little patience and attention to detail, you'll be rewarded with a batch of irresistible treats. Here's a detailed guide to help you:
- Activate the Yeast & Mix the Wet Base: Begin by gently warming your milk until it's just lukewarm (around 105-115°F or 40-46°C). Too hot will kill the yeast, too cold won't activate it. Stir in the active dry yeast and let it sit for 5-10 minutes until foamy. In a separate large bowl, combine the real pumpkin purée, melted butter, and about half of a lightly beaten egg. This initial mix sets the stage for a rich and flavorful dough.
- Combine Wet and Dry Ingredients, Then Rest: To your wet ingredients, add sugar and salt. Pour in the activated milk-and-yeast mixture. Stir until well combined. Gradually add your all-purpose flour, mixing until a soft, shaggy dough forms. Cover the bowl with plastic wrap and let it rest for a crucial 15 minutes. This resting period, known as autolyse, allows the flour to fully hydrate and gluten to begin developing, making subsequent kneading easier and more effective.
- Knead the Dough to Perfection: Transfer the dough to a lightly floured surface. Now comes the kneading! Knead vigorously for at least 10 minutes. The dough will start off slightly sticky, but as you knead, it will become smoother, more elastic, and less tacky. A well-kneaded dough is key to a light and airy final product. Don't be tempted to add too much extra flour; a slightly tacky dough is desirable.
- First Rise (Proofing): Place the kneaded dough into a clean, lightly floured bowl. Cover it tightly with plastic wrap or a damp kitchen towel. Let it rise in a warm, draft-free spot for approximately 1 hour, or until it has doubled in size and feels airy when gently pressed. Patience here is a virtue; don't rush the rise!
- Divide, Fill, and Seal: Once risen, gently deflate the dough and knead it lightly to release any large air bubbles. Using a kitchen scale is recommended for consistency: divide the dough into 10 equal pieces, each weighing about 55 grams. Flatten each piece into a small disc, place one square of dark chocolate in the center, and carefully gather the edges of the dough around the chocolate, pinching firmly to seal it into a smooth ball. Ensure no chocolate is exposed, as it could leak during baking.
- Shape Your Mini Pumpkins, Second Rise, and Brush: This is where the magic happens! Take a piece of kitchen twine (food-safe, unbleached cotton is best) and wrap it around each filled dough ball, crisscrossing it at the top and bottom to create 6-8 sections, mimicking the grooves of a pumpkin. Tie the twine loosely – remember the dough will expand. Place the shaped dough balls on a baking sheet lined with parchment paper. Let them rise again for another 30 minutes. Just before baking, gently brush the tops of the breads with the remaining beaten egg; this egg wash will give them a beautiful golden sheen and a slightly crisp crust.
- Bake to Golden Perfection: Preheat your oven to the specified temperature. Bake the mini pumpkin breads until they are beautifully golden brown and firm to the touch. Your kitchen will be filled with the most incredible aroma of butter and warm pumpkin! Once baked, let them cool slightly on a wire rack. Carefully snip and remove the twine once cooled enough to handle.
- Decorate & Serve: For an extra festive touch, adorn your cooled mini pumpkins with candy eyes. Serve them warm from the oven for the ultimate melty chocolate experience, or at room temperature. They are truly best enjoyed fresh!
Tips for Perfection & Spooky Serving Ideas
To ensure your pumpkin bread Halloween edition is nothing short of spectacular, consider these additional tips and creative serving suggestions:
- Don't Over-Flour: When kneading, resist the urge to add too much extra flour. A slightly sticky dough is often a sign of good hydration, which contributes to a moist, tender crumb. Use just enough flour to prevent sticking.
- Proofing Environment: If your kitchen is cool, you can create a warm proofing environment. Turn your oven on to its lowest setting for a few minutes, then turn it off. Place your covered dough inside (oven off!) with the door slightly ajar.
- Chocolate Alternatives: While dark chocolate is divine, feel free to experiment! Milk chocolate, white chocolate, or even a spoonful of Nutella or a dollop of cream cheese filling could make for a delicious surprise.
- Spice it Up (or Down!): Adjust the amount of cinnamon, nutmeg, ginger, and cloves to your personal preference. A pinch of allspice or cardamom can also add another layer of warmth.
- Decorating Beyond Candy Eyes: Once cooled, you can pipe a small green frosting stem on top, dust them with powdered sugar for a snowy effect, or even use edible glitter for some spooky sparkle.
- Serving Suggestions: These mini pumpkin breads are incredibly versatile. Serve them as a dessert with a scoop of vanilla ice cream, alongside your morning coffee or tea, or as a unique addition to a fall brunch spread. They also make fantastic, heartfelt party favors or hostess gifts during the Halloween season.
- Storage: Store leftover mini pumpkin breads in an airtight container at room temperature for up to 3 days. For longer storage, freeze them (without candy eyes) for up to 2 months. Thaw at room temperature and warm gently in the oven for that "freshly baked" feel.
There's something truly special about baking for the holidays, and these adorable mini pumpkin breads, with their hidden melty chocolate hearts, embody the joy and spirit of Halloween perfectly. This pumpkin bread Halloween edition is more than just a recipe; it's an invitation to create warmth, deliciousness, and a little bit of magic in your home. So gather your ingredients, activate that yeast, and prepare to delight friends and family with these irresistible, charming pumpkin treats. Happy baking!
